Dyeing an action figure is a great way to give a clean base of color to a piece. It also allows you to have joints whose paint will not rub off with movement and the passage of time. However, it also comes with it's fair share of challenges.
Color - You can't always achieve the color you want because the dye color mixes with the color of the plastic and the paint on the plastic giving you a hybrid color. It is much easier to get the desired color if you start with a white or very light colored piece. Black is usually a safe bet and with enough time, it will work on just about any color plastic.
Rub Off - Dyed parts tend to rub off onto anything they come in contact with, even after rinsing them multiple times. To combat this, after I dye a figure or part, I seal it with a matte clearcoat sealer. You can find cans of this stuff from various companies at just about any hobby store. I personally use the Games Workshop Purity Seal. It's pricey but I like the result.
With those challenges in mind, this is what I use to dye my parts...


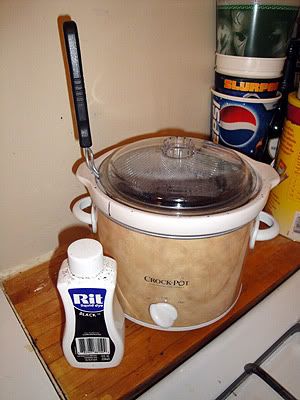
It's a small crock pot and a strainer with the handle bent for ease of use and Rit liquid dye.
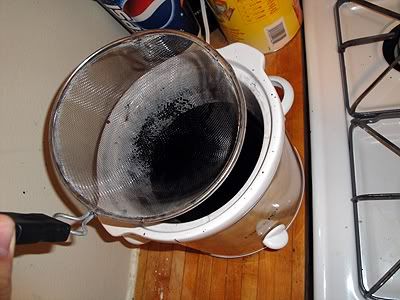
I add the dye and some water to the pot and then turn it on high to warm up. After fifteen minutes or so, I turn it down to low and add place the parts into the strainer and set them in the dye. I let them sit in the dye for an hour or so, checking on them every ten minutes or so, rotating them to give them an even color and to make sure no air bubles keep dye off the piece. Sometimes more stubborn parts require more time and more heat but for the most part the process happens quickly.
When they've achieved the desired color, I remove the pieces and rinse them with cool water. !WARNING! I always wear gloves and let them dry on several layers of newspaper and paper towels as they will bleed and dye is very hard to remove from anything.
Here is an example of a figure whose body I dyed black.

(More about Cobra De Aco in a future post.)


Great post. Gives us ideas on how to build a lab for our custom creations.
ReplyDeletewww.customsforthekid.blogspot.com
I am an experienced customizer, often post my things on Deviantart or Hisstank and a friend of mine recently turned me on to RIT dye, I normally use a dremel to get paint to stick to joints but RIT seemed easier. so I followed the instructions you put up on here, even used liquid black RIT dye to try to get the joints to go black on Retaliation Jinx(who is blinding yellow)so I could turn her into Vypra. Well about and hour and a half of soaking her in the RIT on medium heat nothing happened, just gave her a slight wash that's it, the joints weren't even tinted. am I doing something wrong or has RIT changed their formula?
ReplyDeleteHi Chris,
ReplyDeleteI suggest using a low heat for a much longer time period. In addition, some plastic takes better to dye than others. It took hours for the red to saturate the legs of my Hard Master custom.
http://insidiouscustoms.blogspot.com/2010/06/hard-master-from-gi-joe-custom-action.html
You just have to be careful to keep checking on them as they can warp under the heat if you're not careful. Good luck!